Ticket
Hyphenate has launched a powerful online ticket system that supports multi-person collaboration. Tickets can be submitted to the ticket system via e-mail, web, and telephone. Hyphenate Customer Engagement Cloud provides the “ticket integration” function to connect with the ticket system.
The “ticket integration” function is a value-added service. To activate it, please go to “Admin Mode > Ticket > Apply Ticket”, and fill in the application form.
Apply for the Ticket Function
After you apply for the ticket function and configure your system email address, you can start provide ticket service for your customers.
Follow these steps:
- Go to “Admin Mode > Ticket > Apply Ticket”, and click the Apply Ticket button.
- Enter your contact information (your name, phone, company name, email address), and click Submit.
After submitting your application, please be patient and your business manager will contact you as soon as possible.
Create a Ticket
When a customer's consultation requires a follow-up, you can create a ticket for the customer so that experts in the ticket system can continue to serve the customer.
Note:
When you create a new ticket or reply to a ticket, the system will notify the customer of the ticket content by mail. You need to complete the customer's email address on the “Profile” tab.
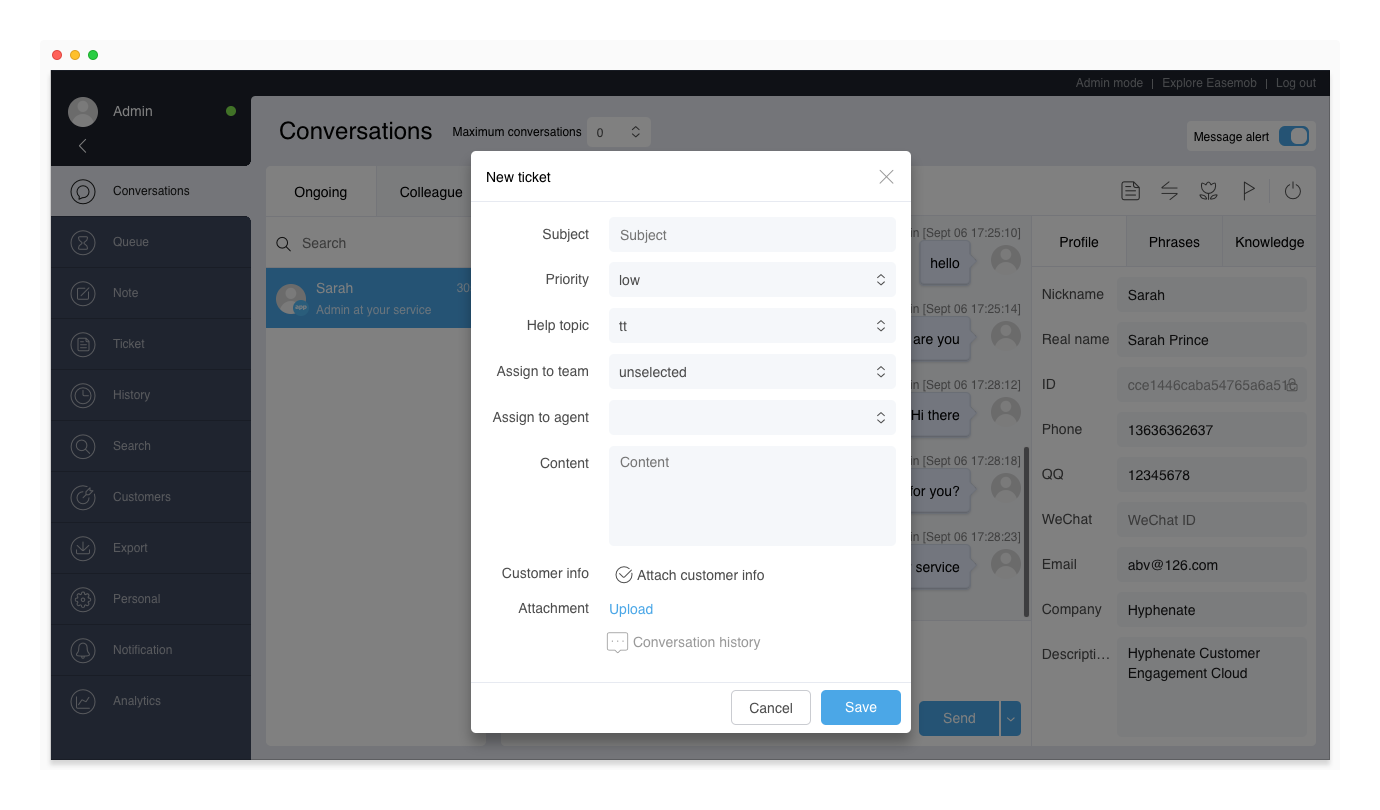
Create a ticket during a conversation:
- On the Conversations page, click the ticket button
 at the upper right.
 - Fill in the subject, select the priority, help topic, team and agent, fill in the content of the ticket, and then click Save.
When “Attach customer info” is checked, the ticket contains the corresponding customer information, which can be viewed on the “Profile” tab of the ticket detail page.

After a ticket is created, the ticket system automatically sends an e-mail to the customer's mailbox.
Create a ticket after a conversation Is closed:
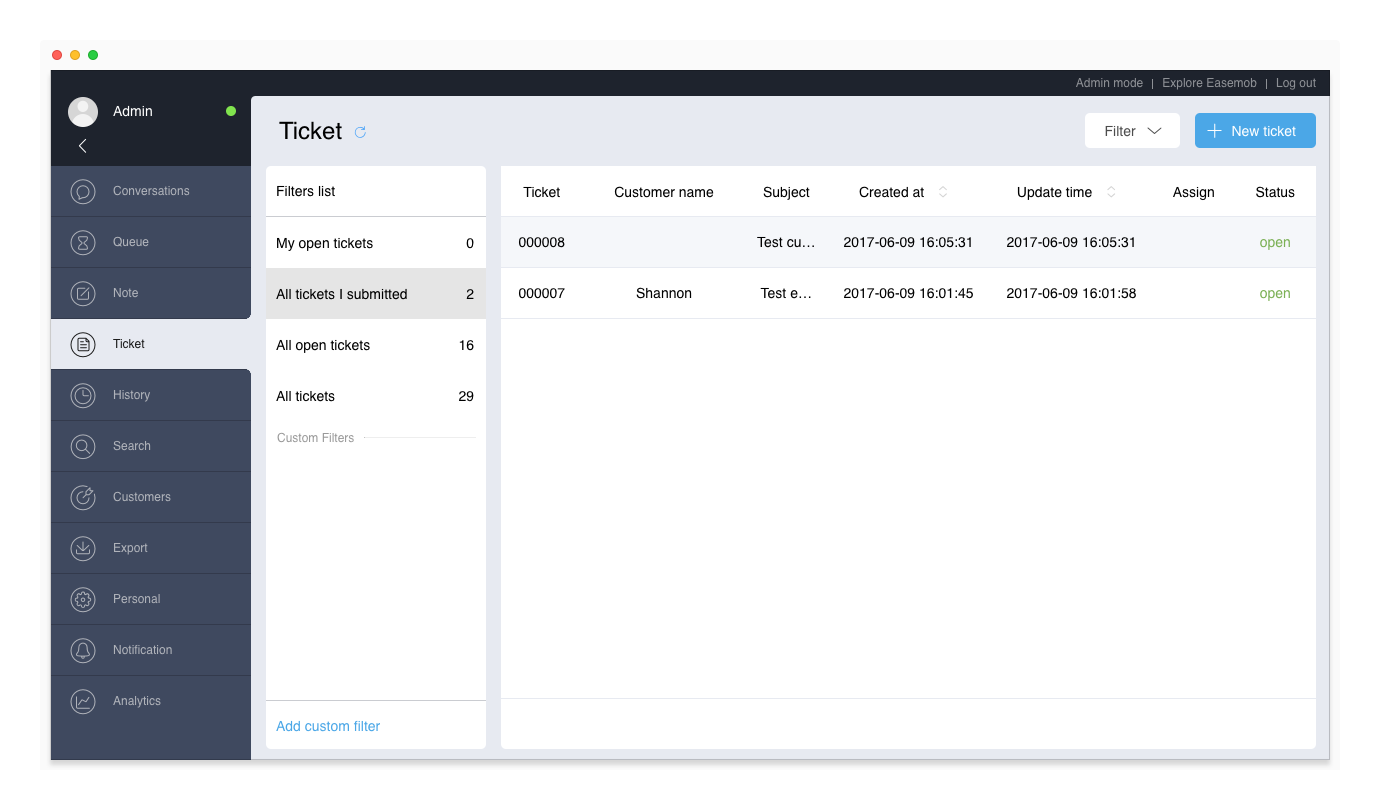
- Go to the Ticket page, and click New Ticket in the upper right corner.
- Fill in the subject, select the priority, help topic, team and agent, fill in the content of the ticket, select the customer info, and then click Save.

Handle a Ticket
You can reply to a ticket, assign the ticket to another team or agent, modify the help topics, priority, ticket status, view the ticket progress, and view the customer information.
On the ticket page, click any ticket to see the details of the ticket. On the ticket detail page, you can perform the following actions:
- Reply to the ticket: You can submit your reply as a public reply so that the system sends an e-mail to notify the customer. Or, you may ignore the “Submit as public reply” option so that the reply is visible only to other agents.
- Handle the ticket: Assign the ticket to another team or agent, modify its help topic, priority and status.
- View progress: View the progress of the ticket.
- View customer info: you can view the customer info in the ticket.
Note: The ticket created on the Conversations page also includes the conversation record, which allows you to view the corresponding conversation detail.
Filter Tickets
On the Ticket page, some filters are created for you to help you manage the tickets. You can also create custom filters to meet more specific needs.
To create a custom filter:
- On the Ticket page, click Add Custom Filter.
- Fill in the filter name, select the filtering conditions, such as the creation time, creator, customer name, ticket number, ticket title, team, agent, help topic, ticket status, and click OK.
Once a filter is created, you can filter the tickets based on the filter. You can also edit or delete custom filters.
Ticket Alert/Notification
On the ticket detail page, on the Handle tab, you can set the alert time and alert message. At the alert time, the agent, to whom the ticket is assigned, receives the alert message on the Notification page.
When a ticket is created successfully, assigned to a team or agent, replied to, or the ticket status is changed, the agent who created the ticket receives a system message on the Notification page.
Ticket Callback
If you want to communicate with the customer while viewing the conversation history of a ticket, you can click the Callback button to start a conversation with the customer.